vue

双向绑定

通过构造函数 Vue 就可以创建一个 Vue 的根示例,并启动 Vue 应用,Vue 实例需要挂载一个 DOM 元素,它可以是 HTMLElement,也可以是 CSS 选择器

1
2
3
4
5
6
7
8
9
10
11
12
13
14
15
16
17
18
19
20
21
22
23
24
25
26
<!DOCTYPE html>
<html>
<head>
<meta charset="utf-8" />
<title>Vue 测试实例 - 菜鸟教程(runoob.com)</title>
<script src="https://unpkg.com/vue/dist/vue.min.js"></script>
</head>

<body>
<div id="app">
<p>{{ message }}</p>
</div>

<script>
var app = new Vue({
el: "#app",
data: {
message: "Hello Vue.js!",
},
});

console.log(app);
console.log(app.message);
</script>
</body>
</html>

上述 Vue 实例的构造器中的成员变量可以通过app.$elapp.$data的方式去访问,对于 data 数据,可以直接使用app.message去访问。在 dom 上以 {{}} 包含的内容与 app 进行双向绑定。当我们在 console 控制台修改app.messege的值时,页面也随着刷新 message 的内容

双向绑定实现原理

异步更新队列

Vue 在观察到数据变化时并不是直接更新 DOM,而是开启一个队列,并缓冲同一事件循环中发生的所有数据改变。在缓冲时会去除重复数据,从而避免不必要的计算和 DOM 操作。然后在下一个事件循环 tick 中,Vue 刷新队列并执行实际(已去重的)工作

1
2
3
4
5
6
7
8
9
10
11
12
13
14
15
16
17
18
19
20
21
22
<div id="app">
<div id="div" v-if="showDiv">这是一段文本</div>
<button @click="getText">获取div内容</button>
</div>
<script>
var app = new Vue({
el: "#app",
data: {
showDiv: false,
},
methods: {
getText: function () {
this.showDiv = true;
//在执行this.showDiv = true时,div仍然没有被创建出来,直到下一个Vue事件循环时,才开始创建。$nextTick就是用来直到什么时候DOM更新完成的
this.$nextTick(function () {
var text = document.getElementById("div").innerHTML;
console.log(text);
});
},
},
});
</script>

生命周期

每个 Vue 示例创建时,都会经历一系列的初始化过程,同时也会调用相应的生命周期钩子。比较常用的生命周期有

  • created 示例创建完成后调用,次阶段完成了数据的观测等,但尚未挂载,$el 还不可用,需要初始化一些处理数据时会比较有用
  • mounted el 挂载到实例上后调用
  • beforeDestroy 实例销毁前调用。主要是解绑一些使用 addEventListener 监听的事件等。

这些钩子与 el 和 data 类似,作为选项写入 Vue 实例

1
2
3
4
5
6
7
8
9
10
11
12
13
var app = new Vue({
el: "#app",
data: {
message: "Hello Vue.js!",
},
created: function () {
console.log(this.message);
console.log(this.$el); //undefined
},
mounted: function () {
console.log(this.$el);
},
});

手动挂载实例

Vue 提供了 Vue.extend 和$mount两个方法将 vue 实例挂载到一个 dom 上,即如果 Vue 实例在实例化时它没有收到 el 选项,它就处于“未挂载”状态,没有关联的 DOM 元素。可以使用$mount()手动挂载一个未挂载的实例。这个方法返回实例自身,因而可以链式调用其他实例方法。

1
2
3
4
5
6
7
8
9
10
11
12
13
14
15
16
17
18
19
20
21
22
23
24
25
26
27
28
29
30
<div id="app">
<my-component></my-component>
</div>
<div id="app2">
<my-component></my-component>
</div>
<div id="app3">
<my-component></my-component>
</div>
<script type="text/x-template" id="my-component">
<div>
<h1>h1</h1>
<h1>h2</h1>
</div>
</script>

<script>
var app = Vue.extend({
components: {
"my-component": {
template: "#my-component",
},
},
});
new app().$mount("#app");
new app().$mount("#app2");
new app({
el: "#app3",
});
</script>

插值与表达式

  1. {{}} 使用双大括号(Mustache 语法),双向绑定的数据,{{}} 内部可以使用 js 运算

    1
    2
    3
    4
    5
    6
    7
    8
    9
    10
    11
    12
    13
    14
    <div id="app">
    {{number/10}}
    {{isOK?'确定':'取消'}}
    {{text.split(',').reverse().join('|')}}
    </div>
    <script>
    new Vue({
    el: "#app",
    data: {
    number:100,
    isOK:false,
    text:'123,456'
    },
    });
  2. {{}} 支持使用管道符|来对数据进行过滤,过滤的规则是自定义了,通过选项filters来设置,过滤器可以接受参数,过滤器可以串联

    1
    2
    3
    4
    5
    6
    7
    8
    9
    10
    11
    12
    13
    14
    15
    16
    17
    18
    19
    <div id="app">
    {{text|split}}
    <!-- 串联-->
    {{text|split|split}}
    <!-- arg1 arg2 分别为过滤器的第二个 第三个参数-->
    {{text|split('arg1','arg2')}}
    </div>
    <script>
    new Vue({
    el: "#app",
    data: {
    text:'123,456'
    },
    filters:{
    split:function(value){
    return value.split(',').join('#');
    }
    }
    });
  3. computed 通过 Vue 选项 computed 的计算属性获取数据,每一个计算属性都包含一个 getter 和 setter,默认只使用 getter,当 getter 中所依赖的任何数据变化时,当前 getter 会被自动触发。相对于直接使用 methods,computed 只有在源数据更新后才会被重新调用

    1
    2
    3
    4
    5
    6
    7
    8
    9
    10
    11
    12
    13
    14
    15
    <div id="app">
    {{text}}
    </div>
    <script>
    new Vue({
    el: "#app",
    data: {
    number:100
    },
    computed:{
    text:function(){
    return '$'+this.number
    }
    }
    });

    当我们对app.number进行赋值时,页面上 text 的值也会跟着变化,但是对 text 的值进行改变,number的值不会变化, 当我们指定其 setter 就可以了

    1
    2
    3
    4
    5
    6
    7
    8
    computed:{
    set: function (value) {
    this.number = parseInt(value.substring(1))
    },
    get: function () {
    return '$' + this.number
    }
    }

指令

  1. v-bind 动态更新 html 元素上的属性,可以使用语法糖:

    1
    2
    3
    4
    5
    6
    7
    8
    9
    10
    <a v-bind:href="url"> 链接</a>
    <!--语法糖-->
    <a :href="url"> 链接</a>
    <script>
    new Vue({
    data: {
    url: "http://example.com",
    },
    });
    </script>
  2. v-for 迭代的数据也是双向绑定的,对数组或对象进行操作时会触发渲染

    遍历数组,需要注意的是直接通过索引去设置值是无法被 Vue 检测到的,也不会触发视图更新

    1
    2
    3
    4
    5
    6
    7
    8
    9
    10
    11
    <ul>
    <li v-for="book in books">{{ book.name}}</li>
    <li v-for="(book,index) in books">{{ index}} - {{book.name}}</li>
    </ul>
    <script>
    new Vue({
    data: {
    books: [{ name: "v1" }, { name: "v2" }],
    },
    });
    </script>

    遍历对象

    1
    2
    3
    4
    5
    6
    7
    8
    9
    10
    11
    12
    13
    14
    <ul>
    <li v-for="(value,key,index) in user">{{ index}} - {{key}}:{{value}}</li>
    </ul>
    <script>
    new Vue({
    data: {
    user: {
    name: "hello",
    gender: "man",
    age: 23,
    },
    },
    });
    </script>

    迭代整数

    1
    <li v-for="n in 10">{{ n}}</li>

    若我们需要操作数组,可使用数组自带的方法区操作, 例如

    • pop 删除末项
    • push 添加一项
    • shift 删除第一项
    • unshift 添加第一项
    • splice 截取/修改/删除数组元素
    • sort 对数组排序
    • reverse 取反

    也可以通过直接修改数组的引用 或使用Vue.setthis.$set

  3. v-html 输出 HTML

    1
    2
    3
    4
    5
    6
    7
    8
    9
    <span v-html="link">}</span>
    <script>
    new Vue({
    el: "#app",
    data: {
    link: '<a href="#">一个链接</a>',
    },
    });
    </script>
  4. v-ifv-else-if(必须紧跟 v-if)、 v-else(b 必须紧跟 v-if 或 v-else-if) 表达式为正,当前元素、组件所有子节点将被渲染,否则全部移除

    1
    2
    3
    <p v-if="status ===1">当status为1时显示这行</p>
    <p v-else-if="status ===2">当status为2时显示这行</p>
    <p v-else>否则显示这行</p>
  5. v-model 绑定表单数据,也是双向绑定的,对于中文输入法,只有在回车后才会触发更新

    1
    2
    3
    4
    5
    6
    7
    8
    9
    10
    11
    12
    13
    <input v-model="input" />
    <p style="color: red;">{{input}}</p>

    <!-- 使用@input可以在输入中文时实时刷新-->
    <input @input="inputHandle" />
    <script>
    //...
    methods:{
    inputHandle:function(e){
    this.input = e.target.value
    }
    }
    </script>

    v-model 可使用修饰符控制数据同步的机制

    • .lazy v-model 默认在 input 事件中同步输入框的数据,使用.lazy会转变在 change 事件中同步
    • .number 将输入转换为 Number 类型
    • .trim 过滤首位空格

    示例

    1
    2
    3
    <input v-model.lazy="value" />
    <input v-model.number="value" />
    <input v-model.trim="value" />
  6. v-on绑定事件监听器,可以使用语法糖:,可以用.native修饰符表示监听的是一个原生事件。

    1
    2
    3
    4
    5
    6
    7
    8
    9
    10
    11
    12
    <a v-on:click="log"> 链接</a>
    <!--语法糖-->
    <a @click="log"> 链接</a>
    <script>
    new Vue({
    methods: {
    log: function (event) {
    console.log(event); //event为触发的事件
    },
    },
    });
    </script>
  7. v-once 值渲染一次,包括元素和组件的所有子节点(包括 v 指令等)。首次渲染后,不再随数据的变化重新渲染

  8. v-pre 跳过编译

    1
    <span v-pre> {{这里面不会被编译}}</span>
  9. v-show 进行 CSS 属性切换,是否可见

自定义指令

例如注册一个 v-focus 的指令,用于在<input>元素初始化时自动获取焦点

1
2
3
4
5
6
7
8
9
10
11
12
13
//全局注册
Vue.directive("focus", {
//指令选项
});
//局部注册
var app = new Vue({
el: "#app",
directives: {
focus: {
//指令选项
},
},
});

自定义指令由几个钩子函数组成的,每个都是可选的

  • bind 只调用一次,指令在第一次绑定元素时调用,用这个钩子函数可以定义一个绑定时指定一次的初始化动作
  • inserted 被绑定元素插入父节点时调用
  • update 被绑定元素所在的模板更新时调用,而不论绑定值是否变化,通过比较更新前后的绑定值,可以忽略不必要的模板更新
  • componentUpdated 被绑定元素所在模板完成一次更新周期时调用
  • unbind 只调用一次,指令与元素解绑时调用

每个钩子函数都一次有几个参数可用

  • el 指定绑定的元素,可以用来直接操作 DOM
  • binding 一个对象,包含以下属性

    • name 指令名,不包含 v-前缀
    • value 指令绑定的值,例如v-my-directive="1+1",value 的值就是 2
    • oldValue 指令绑定的前一个值,仅在 update 和 componentUpdated 钩子中可用,无论值是否改变都可用
    • expression 绑定值的字符串形式,例如v-my-directive="1+1",expression 的值就是 1+1
    • arg 传给指令的参数,例如v-my-directive:foo,arg 的值是 foo
    • modifiers 一个包含修饰符的对象,例如v-my-directive.foo.bar,修饰符对象 modifiers 的值是{foo:true,bar:ture}
  • vnode Vue 编译生成的虚拟节点
  • oldVnode 上一个虚拟节点仅在 update 和 componentUpdated 钩子中可用 根据需求在不同的钩子函数内完成逻辑代码,例如 v-focus,我们希望在元素插入父节点时调用,那用到的最好是 inserted。示例如下

1
2
3
4
5
6
7
8
9
10
11
12
13
14
15
16
17
18
19
20
21
22
23
24
25
26
27
28
29
30
31
<div id="app">
<input v-focus:arg.foo.bar="1+1" />
</div>

<script>
Vue.directive("focus", {
//指令选项
inserted: function (el, binding, vnode) {
el.focus();
console.log(el);
//<input>
console.log(JSON.stringify(binding));
/**
{
"name": "focus",
"rawName": "v-focus:arg.foo.bar",
"value": 2,
"expression": "1+1",
"arg": "arg",
"modifiers": { "foo": true, "bar": true },
"def": {}
}
*/
}

},
});
var app = new Vue({
el: "#app",
});
</script>

自定义指令也可以传入一个 JavaScript 对象字面量

1
<input v-focus="{msg:'hello',count:100}" />

自定义插件

注册插件

1
2
3
4
5
6
7
8
9
// 在Vue内部实际上会调用`MyPlugin.install(Vue)`
Vue.use(MyPlugin);

new Vue({
//... options
});

插件也可以带上自定义参数;
Vue.use(MyPlugin, { someOption: true });

自定义插件

1
2
3
4
5
6
7
8
9
10
11
12
13
14
15
16
17
18
19
20
21
22
23
24
25
MyPlugin.install = function (Vue, options) {
// 1. 注册Vue全局函数
Vue.prototype.myGlobalMethod = function () {
}

// 2. 添加全局指令
Vue.directive('my-directive', {
bind (el, binding, vnode, oldVnode) {
}
...
})

// 3. 注入一些组件选项,对所有组件都会有效
Vue.mixin({
created: function () {
// some logic ...
}
...
})

// 4. 注册实例函数
Vue.prototype.$myMethod = function (methodOptions) {
// some logic ...
}
}

绑定 class 的几种方式

v-bind 中的表达式最终会被解析为字符串,Vue 对 v-bind 增强了一些功能,提供了多重语法

  1. 对象语法

    1
    2
    3
    4
    5
    6
    7
    8
    9
    <div :class="{'class1':isActive1,'class2':isActive2}"></div>
    <script>
    new Vue({
    data: {
    isActive1: true,
    isActive2: false,
    },
    });
    </script>

    上述渲染后的页面元素为<div class="class1"></div>

    也可使用 computed

    1
    2
    3
    4
    5
    6
    7
    8
    9
    10
    11
    12
    13
    <div :class="classes"></div>
    <script>
    new Vue({
    computed: {
    classes: function () {
    return {
    class1: this.isActive1,
    class2: this.isActive2,
    };
    },
    },
    });
    </script>

    也可以指定绑定到一个对象上

  2. 数组语法

    1
    2
    3
    4
    5
    6
    7
    8
    9
    <div :class="[c1,c2]"></div>
    <script>
    new Vue({
    data: {
    c1: 'class1'
    c2: 'class2'
    }
    });
    </script>

事件

修饰符

修饰符

. stop . prevent . capture . self . once

1
2
3
4
5
6
7
8
9
10
11
12
13
14
<!-- 阻止单击事件冒泡-->
<a @click.stop="handle"></a>
<!-- 提交事件不重载页面-->
<form @submit.prevent="handle"></form>
<!-- 修饰符可以串联-->
<a @click.stop.prevent="handle"></a>
<!-- 添加事件侦听器使用事件捕获模式-->
<a @click.capture="handle"></a>
<!-- 仅当事件在元素本身(而不是子元素)触发时触发回调-->
<a @click.self="handle"></a>
<!-- 只触发一次,组件同样使用-->
<a @click.once="handle"></a>
<!-- 只有在keyCode是enter时调用submit-->
<a @keyup.enter="submit"></a>

按键

keyCode

  • .enter
  • .tab
  • .delete
  • .esc
  • .space
  • .up
  • .down
  • dblclick 双击

按键可以组合,或和鼠标一起配合使用

1
2
3
4
<!-- 按下shift时点击-->
<p @click.shift="handle">{{text1}}</p>
<!-- 按下shift和enter,一起时触发-->
<input @keyup.shift.enter="handle" />

$emit

使用$emit来触发自定义事件,使用$on来监听子组件的事件。

例如

1
2
3
4
5
6
7
8
9
10
11
12
13
14
15
16
17
18
19
20
21
22
23
24
25
26
27
28
29
30
31
32
33
34
35
36
37
38
39
40
41
42
43
44
45
<div id="app">
<p>总数:{{total}}</p>
<li-div @increase="handleGetTotal" @reduce="handleGetTotal"></li-div>
</div>

<script>
var app = new Vue({
el: "#app",
data: {
total: 0,
},
methods: {
handleGetTotal: function (total) {
this.total = total;
},
},

components: {
"li-div": {
template: '<div>\
<button @click="handleIncrease"> +1</button>\
<button @click="handleReduce"> -1</button>\
</div>',
data: function () {
return {
counter: 0,
};
},
methods: {
handleIncrease: function () {
this.counter++;
this.$emit("increase", this.counter);
},
handleReduce: function () {
this.counter--;
if (this.counter <script 0) {
this.counter = 0;
}
this.$emit("reduce", this.counter);
},
},
},
},
});
</script>

v-model语法糖,v-model绑定的是一个数据,接收一个 value 属性,,在其有新的 value 时会触发 input 事件。反之亦然。 等价于<input :value='someVariable' @input='someHandle'>

所以上述事例也可以写成如下

1
2
3
4
5
6
7
8
9
10
11
12
13
14
15
16
17
18
19
20
21
22
23
24
25
26
27
28
29
30
31
32
33
34
35
36
37
38
39
40
41
42
43
44
45
<div id="app">
<p>总数:{{total}}</p>
<li-div v-model="total"></li-div>
</div>

<script>
var app = new Vue({
el: "#app",
data: {
total: 0,
},
methods: {
handleGetTotal: function (total) {
this.total = total;
},
},

components: {
"li-div": {
template: '<div>\
<button @click="handleIncrease"> +1</button>\
<button @click="handleReduce"> -1</button>\
</div>',
data: function () {
return {
counter: 0,
};
},
methods: {
handleIncrease: function () {
this.counter++;
this.$emit("input", this.counter);
},
handleReduce: function () {
this.counter--;
if (this.counter <script 0) {
this.counter = 0;
}
this.$emit("input", this.counter);
},
},
},
},
});
</script>

不同组件互相通信

建议通过一个空的 vue 实例作为中央事件总线来实现。

1
2
3
4
5
6
7
8
9
10
11
12
13
14
15
16
17
18
19
20
21
22
23
24
25
26
27
28
29
30
31
32
33
34
35
36
37
38
<div id="app">
<button @click="click">click</button>
<l1></l1>
<l2></l2>
</div>

<script>
var bus = new Vue();
var template = function (name) {
return {
template: "<div>" + name + ":{{message}}</div>",
data: function () {
return {
message: "",
};
},
mounted: function () {
var _this = this;
bus.$on("on-message", function (msg) {
_this.message = msg;
});
},
};
};
var l1 = template("l1");
var l2 = template("l2");
var app = new Vue({
el: "#app",
methods: {
click: function () {
bus.$emit("on-message", "来自app的消息");
// 可以直接使用this.$children查看当前子组件的实例,子组件也可以使用this.$parent访问到父组件
//当给子标签定义ref时可以使用this.$refs.ref去访问子标签的Vue实例
},
},
components: { l1, l2 },
});
</script>

slot

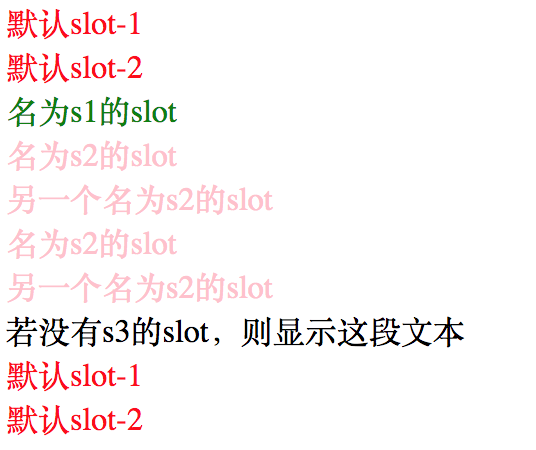
当在子组件内使用特殊的<slot>元素就可以为这个子组件开启一个slot(插槽),在父组件的模板里,插入在子组件模板标签内的所有内容将替代子组件内的<slot>标签以及它的内容,slot可以指定一个 name,其会加载父组件的子组件模板标签内中属性slot值相同的内容。没有指定slot值的标签都作为默认匿名 slot

1
2
3
4
5
6
7
8
9
10
11
12
13
14
15
16
17
18
19
20
21
22
23
24
25
26
27
<div id="app">
<li_slot>
<div style="color:red">默认slot-1</div>
<div slot="s1" style="color:green">名为s1的slot</div>
<div slot="s2" style="color:pink">名为s2的slot</div>
<div slot="s2" style="color:pink">另一个名为s2的slot</div>
<div style="color:red">默认slot-2</div>
</li_slot>
</div>

<script>
var app = new Vue({
el: "#app",
components: {
li_slot: {
template: '<div>\
<slot></slot>\
<slot name="s1"></slot>\
<slot name="s2"></slot>\
<slot name="s2">若没有s2的slot,则显示这段文本</slot>\
<slot name="s3">若没有s3的slot,则显示这段文本</slot>\
<slot></slot>\
</div>',
},
},
});
</script>
vue_输出效果如下.png
vue_输出效果如下.png

作用域插槽(template)是一种特殊的 slot,使用一个可以复用的模板替换已渲染元素,该模板可以定义 scope,定义一个临时变量作用域,模板内部可以使用scope_name.msg的语法访问子组件插槽的数据 msg

1
2
3
4
5
6
7
8
9
10
11
12
13
14
15
16
17
18
19
20
21
<div id="app">
<li-slot>
<template scope="scope_name">
<p>来自父组件的内容</p>
<p>{{scope_name.msg}}</p>
</template>
</li-slot>
</div>

<script>
var app = new Vue({
el: "#app",
components: {
"li-slot": {
template: '<div>\
<slot msg="来自子组件的内容"></slot>\
</div>',
},
},
});
</script>

作用域插槽更具有代表性的用例是列表组件

1
2
3
4
5
6
7
8
9
10
11
12
13
14
15
16
17
18
19
20
21
22
23
24
25
26
27
28
29
30
31
32
33
34
35
<div id="app">
<list-slot :books="books">
<template slot="book" scope="scope_name">
<li>{{scope_name.bookName}}</li>
</template>
</list-slot>
</div>

<script>
var app = new Vue({
el: "#app",
data: {
books: [
{ name: "Vue.js实战" },
{ name: "java实战" },
{ name: "python实战" },
],
},
components: {
"list-slot": {
props: {
books: {
type: Array,
default: function () {
return [];
},
},
},
template: '<ul>\
<slot name="book" v-for="book in books" :book-name="book.name"></slot>\
</ul>',
},
},
});
</script>

我们可以使用$slots访问默认作用域的 slot 渲染后的标签,$scopedSlots访问所有作用域的标签

1
2
3
4
5
6
7
8
9
10
11
12
13
14
15
16
17
18
19
20
21
22
23
24
25
26
27
28
29
<div id="app">
<li_slot>
<template scope="scope1">
<div style="color:red" scope="scope_name">默认slot</div>
</template>
<div slot="s1" style="color:green">名为s1的slot</div>
<div slot="s2" style="color:pink">名为s2的slot</div>
</li_slot>
</div>

<script>
var app = new Vue({
el: "#app",
components: {
li_slot: {
template: '<div>\
<slot></slot>\
<slot name="s1"></slot>\
<slot name="s2">若没有s2的slot,则显示这段文本</slot>\
<slot name="s3">若没有s3的slot,则显示这段文本</slot>\
</div>',
mounted: function () {
console.log(this.$slots);
console.log(this.$scopedSlots);
},
},
},
});
</script>
vue_slot.png
vue_slot.png

watch

监听 prop 或 data 的改变,当他们发生变化时触发 watch 配置的函数,此时对于节点以及渲染完成,

1
2
3
4
5
6
7
8
9
10
11
12
13
14
15
16
17
18
19
20
21
22
23
24
25
26
27
28
29
30
31
32
33
34
35
36
37
38
39
<div id="app">
<input-number v-model="value"></input-number>
</div>

<script type="text/x-template" id="input-number">
<div class="input-number">
</div>
</script>
<script>
Vue.component("input-number", {
template: "#input-number",
props: {
value: {
type: Number,
default: 0,
},
},
watch: {
value: function (newVal, oldVal) {
console.log("component newVal", newVal);
console.log("component oldVal", oldVal);
},
},
});
</script>
<script>
var app = new Vue({
el: "#app",
data: {
value: 5,
},
watch: {
value: function (newVal, oldVal) {
console.log("newVal", newVal);
console.log("oldVal", oldVal);
},
},
});
</script>

watch 对第一次赋值是不响应的,可通过设置immediate来让其执行。watch 一般仅监听属性的重新赋值,对于对象属性的内部值的操作时不响应的,可通过deep来使其生效

1
2
3
4
5
6
7
8
9
10
11
12
<script>

watch: {
value: {
handler:function (newVal, oldVal) {
},
immediate:true, //第一次赋值时即响应
deep:true //改变obj内的属性时也生效

}
},
</script>

watch 可以监听 vuex 中存储的内容

1
2
3
4
5
6
7
<script>

watch: {
'$store.state.value': function(newVal){
}
},
</script>

表单

单选按钮

当那个单选按钮被选中时,picked 即为对应绑定的数据的值,同一个v-model单选具有排斥性

1
2
3
4
5
6
7
8
9
10
11
12
13
14
15
16
17
18
<div id="app">
<input type="radio" v-model="picked" :value="v1" />
<input type="radio" v-model="picked" :value="v2" />
<label>单选</label>
<p>{{picked}}</p>
<p>{{value}}</p>
</div>

<script>
var app = new Vue({
el: "#app",
data: {
picked: false,
v1: "123",
v2: "456",
},
});
</script>

组件

定义组件

组件最外层仅能有一个标签

1
2
3
4
5
6
7
8
9
10
11
12
13
14
15
16
17
18
19
20
21
22
23
24
25
26
27
28
29
30
31
<div id="app">
<my-component></my-component>
</div>
<script>
//全局组件
Vue.component("my-component", {
template: '<div @click="obj.counter++">{{counter}}</div>',
data: function () {
return {
counter: 0,
};
},
});
//示例组件
var app = new Vue({
el: "#app",
components: {
"my-component": {
template: '<div @click="obj.counter++">{{counter}}</div>',
//es6 语法 等同于 data:function(){}
data() {
return {
counter: 0,
};
},
},
},
});
</script>

异步组件

Vue 允许将组件定义为一个工厂函数,动态解析组件。工厂函数接收一个 resolve(component)回调,也可以使用 reject(reason)指示加载失败

1
2
3
4
5
6
7
8
9
10
11
12
13
14
15
16
17
18
19
20
21
<div id="app">
<lazy-component></lazy-component>
</div>
<script>
var app = new Vue({
el: "#app",
components: {
"lazy-component": function (resolve, reject) {
setTimeout(
//模拟延迟
function () {
resolve({
template: "<div >异步组件</div>",
});
},
3000
);
},
},
});
</script>

嵌套组件

嵌套的组件需要定义在全局组件上,必须设定一个条件来限制递归数量

1
2
3
4
5
6
7
8
9
10
11
12
13
14
15
16
17
18
19
20
21
22
23
24
25
<div id="app">
<child :count="1"></child>
</div>

<script>
Vue.component("child", {
props: {
count: {
type: Number,
default: 1,
},
},
template: '<div>\
<div>\
count:{{count}}\
</div>\
<div>\
<child :count="count+1" v-if= "count < 3" ></child>\
</div>\
</div > ',
});
var app = new Vue({
el: "#app",
});
</script>

动态组件

Vue 提供了一个特殊的元素<component>用来挂载不同的组件,使用is特性来选择要挂载的组件。通常is特性绑定的是组件的名称,组件也可以直接绑定对象。

1
2
3
4
5
6
7
8
9
10
11
12
13
14
15
16
17
18
19
20
21
22
23
24
25
26
27
28
29
30
31
32
33
34
35
36
37
38
<div id="app">
<component :is="currentView"></component>
<button @click="handleChangeView('A')">切换到A</button>
<button @click="handleChangeView('B')">切换到B</button>
<button @click="handleChangeView('C')">切换到C</button>
<button @click="handleChangeView('D')">切换到D</button>
</div>

<script>
var app = new Vue({
el: "#app",
data: {
currentView: "comA",
},
methods: {
handleChangeView: function (component) {
this.currentView = "com" + component;
if (!this.$options.components[this.currentView]) {
// 直接绑定一个组件对象
this.currentView = {
template: "<div>备用组件<div>",
};
}
},
},
components: {
comA: {
template: "<div>组件A<div>",
},
comB: {
template: "<div>组件B<div>",
},
comC: {
template: "<div>组件C<div>",
},
},
});
</script>

X-templates

可以使用这种模板更好的属性模板代码

1
2
3
4
5
6
7
8
9
10
11
12
13
14
15
16
17
18
19
20
21
<script src="vue.min.js"></script>
<div id="app">
<my-component></my-component>
</div>
<script type="text/x-template" id="my-component">
<div>
<h1>h1</h1>
<h1>h2</h1>
</div>
</script>

<script>
var app = new Vue({
el: "#app",
components: {
"my-component": {
template: "#my-component",
},
},
});
</script>

使用 props 传递数据

在组件内可以通过声明 props 访问在父类标签中的属性

1
2
3
4
5
6
7
8
9
10
11
12
13
14
15
16
17
18
19
<div id="app">
<li-div msg="来自父组件的数据"></li-div>
<li-div :bind-msg="msg"></li-div>
</div>

<script>
var app = new Vue({
el: "#app",
data:{
msg:'来自组件的动态数据'
}
components: {
"li-div": {
template: "<div >{{msg}} {{bindMsg}}</div>",
props: ["msg","bindMsg"],
},
},
});
</script>

HTML 特性不区分大小写,当使用 DOM 模板时,驼峰命名的 props 名称要转换为短横分隔命名

1
2
3
4
5
6
<li-div msg-text="来自父组件的数据"></li-div>
<script>
// ...
props: ["msgText"];
template: "<div> {{msgText}}</div>";
</script>

父组件数据变化时传递给子组件默认是单向数据流,即父组件的数据更新会传递给子组件,但反过来不行。

示例:当我们输入内容时,子组件内容跟着变动,而父组件不变

1
2
3
4
5
6
7
8
9
10
11
12
13
14
15
16
17
18
19
<div id="app">
<p style="color: green;">{{msg}}</p>
<li-div :msg="msg"></li-div>
</div>

<script>
var app = new Vue({
el: "#app",
data: {
msg: "fater",
},
components: {
"li-div": {
template: '<div><input :value="msg" v-model="msg"><p>{{msg}}</p><div>',
props: ["msg"],
},
},
});
</script>

在 JavaScript 中对象和数组式引用类型的,指向同一个内存空间,所以 props 中是对象和数组式,在子组件内改变是会影响符组件的。

示例:当我们输入内容时,子组件内容跟着变动,而父组件也会跟着变动

1
2
3
4
5
6
7
8
9
10
11
12
13
14
15
16
17
18
<div id="app">
<p style="color: green;">{{obj.msg}}</p>
<li-div :obj="obj"></li-div>
</div>

<script>
var app = new Vue({
el: "#app",
data: { obj: { msg: "fater" } },
components: {
"li-div": {
template:
'<div><input :value="obj.msg" v-model="obj.msg" /><p>{{obj.msg}}</p><div>',
props: ["obj"],
},
},
});
</script>

数据验证

对于组件的 props,我们可以对其属性进行数据验证,

1
2
3
4
5
6
7
8
9
10
11
12
13
14
15
16
17
18
19
20
21
22
23
24
25
26
27
28
29
30
31
32
33
34
35
36
new Vue({
el: "#app",
components: {
"li-div": {
props: {
//必须是数字类型
propA: Number,
//必须是数字类型或字符串
propB: [Number, String],
//布尔类型,如果没有定义,默认值是true
propC: {
type: Boolean,
default: true,
},
//数字 ,必传
propD: {
type: Number,
required: true,
},
// 如果是数组或对象,默认值必须由函数返回
propE: {
type: Array,
default: function () {
return [];
},
},
//自定义一个验证函数
propF: {
validator: function (data) {
return value > 10;
},
},
},
},
},
});

验证的 type 可以是

  • String
  • Number
  • Boolean
  • Object
  • Array
  • Function

默认情况下含有静态值(非双向绑定的数据)属性的类型为 String,当我们需要自动推断类型时,可以使用v-bind

1
2
3
4
5
6
7
8
9
10
11
12
13
14
15
16
17
18
19
20
21
<div id="app">
<!-- <li-div counter="100"></li-div> -->
<li-div v-bind:counter="100"></li-div>
</div>

<script>
var app = new Vue({
el: "#app",
data: { obj: { msg: "fater" } },
components: {
"li-div": {
template: "<div>{{counter}}<div>",
props: {
counter: {
type: Number,
},
},
},
},
});
</script>

type 也可以是一个自定义构造器,使用 instanceof 检测 当 prop 验证失败时,在开发版本下会在控制台抛出一条警告

mixins

mixins: 是一种分发 Vue 组件中可复用功能的非常灵活的方式。混入对象可以包含任意组件选项。当组件使用 mixins 时,所有 mixins 的选项将被组合到该组件本身的选项,类似预编译过程。

  1. 组件的数据不共享,仅拷贝一份,数组和对象采用的是深拷贝,而非拷贝引用。
  2. 对于值为对象的选项如 methods,components 等,选项会被合并,键冲突的组件会覆盖混入对象的。
  3. 值为函数的选项,如 created,mounted 等,就会被合并调用,混合对象里的钩子函数在组件里的钩子函数之前调用

webpack 过程

使用.vue单文件组件的构建模式,需要 webpack 并使用 vue-loader 对.vue 格式的文件进行处理。一个.vue 文件一般包括 3 部分,即<template>,<script>,<style>

例如:

1
2
3
4
5
6
7
8
9
10
11
12
13
14
15
16
17
18
<template>
<div>你好:{{name}}</div>
</template>
<script>
export default {
props: {
name: {
type: String,
default: "",
},
},
};
</script>
<style scoped>
div {
color: #f60;
}
</style>

示例中的 style 标签使用了 scoped 属性,表示当前的 CSS 只在这个组件有效,如果不加,那么 div 的样式会应用到整个项目。<style>还可以结合 CSS 预编一起使用,比如使用 Less 处理可以写成<style lang='less'>

使用.vue 文件需要安装vue-loadervue-style-loader等加载器并做配置。因为要使用 ES6 语法,还需要安装babelbable-loader等加载器。使用 npm 逐个安装以下依赖

使用vue-cli

1
2
3
4
5
6
# vue2版本对应的cli
npm install -g --save-dev vue-cli


#项目名必须全部小写,安装过程中注意`vue-router`选择`Y`,项目安装失败,尝试重新安装`vue-cli`
vue init webpack vue-demo

安装后,package.json 文件内容如下

1
2
3
4
5
6
7
8
9
10
11
12
13
14
15
16
17
18
19
20
21
22
23
24
25
26
27
28
29
30
31
32
33
34
35
36
37
38
39
40
41
42
43
44
45
46
47
48
49
50
51
52
53
54
55
56
57
58
59
60
61
62
63
64
65
66
67
68
69
{
"name": "vue-demo",
"version": "1.0.0",
"description": "A Vue.js project",
"private": true,
"scripts": {
"dev": "webpack-dev-server --inline --progress --config build/webpack.dev.conf.js",
"start": "npm run dev",
"test": "npm run unit",
"lint": "eslint --ext .js,.vue src test/unit",
"build": "node build/build.js"
},
"dependencies": {
"vue": "^2.5.2",
"vue-router": "^3.0.1"
},
"devDependencies": {
"autoprefixer": "^7.1.2",
"babel-core": "^6.22.1",
"babel-eslint": "^8.2.1",
"babel-helper-vue-jsx-merge-props": "^2.0.3",
"babel-loader": "^7.1.1",
"babel-plugin-syntax-jsx": "^6.18.0",
"babel-plugin-transform-runtime": "^6.22.0",
"babel-plugin-transform-vue-jsx": "^3.5.0",
"babel-preset-env": "^1.3.2",
"babel-preset-stage-2": "^6.22.0",
"chalk": "^2.0.1",
"copy-webpack-plugin": "^4.0.1",
"css-loader": "^0.28.0",
"eslint": "^4.15.0",
"eslint-config-standard": "^10.2.1",
"eslint-friendly-formatter": "^3.0.0",
"eslint-loader": "^1.7.1",
"eslint-plugin-import": "^2.7.0",
"eslint-plugin-node": "^5.2.0",
"eslint-plugin-promise": "^3.4.0",
"eslint-plugin-standard": "^3.0.1",
"eslint-plugin-vue": "^4.0.0",
"extract-text-webpack-plugin": "^3.0.0",
"file-loader": "^1.1.4",
"friendly-errors-webpack-plugin": "^1.6.1",
"html-webpack-plugin": "^2.30.1",
"node-notifier": "^5.1.2",
"optimize-css-assets-webpack-plugin": "^3.2.0",
"ora": "^1.2.0",
"portfinder": "^1.0.13",
"postcss-import": "^11.0.0",
"postcss-loader": "^2.0.8",
"postcss-url": "^7.2.1",
"rimraf": "^2.6.0",
"semver": "^5.3.0",
"shelljs": "^0.7.6",
"uglifyjs-webpack-plugin": "^1.1.1",
"url-loader": "^0.5.8",
"vue-loader": "^13.3.0",
"vue-style-loader": "^3.0.1",
"vue-template-compiler": "^2.5.2",
"webpack": "^3.6.0",
"webpack-bundle-analyzer": "^2.9.0",
"webpack-dev-server": "^2.9.1",
"webpack-merge": "^4.1.0"
},
"engines": {
"node": ">= 6.0.0",
"npm": ">= 3.0.0"
},
"browserslist": ["> 1%", "last 2 versions", "not ie <= 8"]
}

使用npm run dev即可启动一个 dev 服务

路由

定义

单页面应用指的是只有一个主页面,通过动态替换 DOM 内容并同步修改 url 地址,来模拟多页面应用的效果。切换页面的功能直接由前台脚本来完成,而不是后端渲染完毕后前端只负责显示。

前端路由就是一个前端不同页面的状态管理器,可以不向后台发送请求而直接通过前端技术实现多个页面效果。vue 中的 vue-router,react 的 react-router 均是对这种功能的实现。

实现原理可参考这里

vue-route

我们通过 vue-cli 初始化项目后,main.js 的内容如下

1
2
3
4
5
6
7
8
9
10
11
12
import Vue from "vue";
import App from "./App";
import router from "./router";

Vue.config.productionTip = false;

new Vue({
el: "#app",
router,
components: { App },
template: "<App/>",
});

首先页面会渲染成类似如下

1
2
3
4
5
6
<html>
<head> </head>
<body>
<app></app>
</body>
</html>

这里的<app>即是new Vue()中可选参数 template 所生产的标签, 然后根据 components 中定义的 App 组件,将 app 渲染成 app.vue 中的内容

1
2
3
4
5
6
7
8
9
<html>
<head> </head>
<body>
<div id="app">
<img src="./assets/logo.png" />
<router-view />
</div>
</body>
</html>

其中<router-view>路由视图以用来挂载路由,默认挂载/,那么我们根据main.js中引入的 router,找到其对应的 js 文件。

src/router/index.js

1
2
3
4
5
6
7
8
9
10
11
12
13
14
15
import Vue from "vue";
import Router from "vue-router";
import HelloWorld from "@/components/HelloWorld";

Vue.use(Router);

export default new Router({
routes: [
{
path: "/",
name: "HelloWorld",
component: HelloWorld,
},
],
});

根据/路径配置的组件,我们将<router-view>渲染成 HelloWorld 组件的内容

1
2
3
4
5
6
7
8
9
10
11
12
13
14
15
16
17
18
19
20
21
22
23
24
25
26
27
28
29
30
31
32
33
34
35
36
37
38
39
40
41
42
43
44
45
46
47
48
49
50
51
52
53
<html>
<head> </head>
<body>
<div id="app">
<img src="./assets/logo.png" />
<div class="hello">
<h1>{{ msg }}</h1>
<h2>Essential Links</h2>
<ul>
<li>
<a href="https://vuejs.org" target="_blank"> Core Docs </a>
</li>
<li>
<a href="https://forum.vuejs.org" target="_blank"> Forum </a>
</li>
<li>
<a href="https://chat.vuejs.org" target="_blank">
Community Chat
</a>
</li>
<li>
<a href="https://twitter.com/vuejs" target="_blank"> Twitter </a>
</li>
<br />
<li>
<a href="http://vuejs-templates.github.io/webpack/" target="_blank">
Docs for This Template
</a>
</li>
</ul>
<h2>Ecosystem</h2>
<ul>
<li>
<a href="http://router.vuejs.org/" target="_blank"> vue-router </a>
</li>
<li>
<a href="http://vuex.vuejs.org/" target="_blank"> vuex </a>
</li>
<li>
<a href="http://vue-loader.vuejs.org/" target="_blank">
vue-loader
</a>
</li>
<li>
<a href="https://github.com/vuejs/awesome-vue" target="_blank">
awesome-vue
</a>
</li>
</ul>
</div>
</div>
</body>
</html>

路由跳转

router-link是用来动态切换router-view显示内容组件。

示例

我们新建一个组件src/components/link.vue

1
2
3
4
5
6
7
8
9
10
11
12
13
14
15
16
17
18
19
20
21
22
23
24
25
26
27
<template>
<div class="hello">
<h1>{{ msg }}</h1>
</div>
</template>

<script>
export default {
name: "link",
data() {
return {
msg: "测试一下路由链接",
};
},
};
</script>

<style scoped>
h1 {
font-weight: normal;
color: palevioletred;
}

a {
color: red;
}
</style>

在 router 配置中配置 link.vue 的请求路径

1
2
3
4
5
6
7
8
9
10
11
12
13
14
15
16
17
18
19
20
21
  import Vue from "vue";
import Router from "vue-router";
import HelloWorld from "@/components/HelloWorld";
+ import link from "@/components/link";

Vue.use(Router);

export default new Router({
routes: [
{
path: "/",
name: "HelloWorld",
component: HelloWorld,
},
+ {
+ path: "/link",
+ name: "link",
+ component: link,
+ },
],
});

修改src/App.vue

1
2
3
4
5
6
7
8
9
10
11
12
13
14
15
16
17
18
19
20
21
22
23
24
25
26
27
28
29
30
  <template>
<div id="app">
- <img src="./assets/logo.png">
+ <div>
+ <img src="./assets/logo.png">
+ </div>
+ <div>
+
+ <router-link to="/">主页</router-link>
+ <router-link to="/link">测试router-link</router-link>
+ </div>
<router-view />
</div>
</template>
<script>
export default {
name: 'App'
}
</script>

<style>
#app {
font-family: 'Avenir', Helvetica, Arial, sans-serif;
-webkit-font-smoothing: antialiased;
-moz-osx-font-smoothing: grayscale;
text-align: center;
color: #2c3e50;
margin-top: 60px;
}
</style>

当我们点击由router-link渲染出来的<a>链接,其下面的router-view对应的元素将会被切换至对应的在路由中配置的组件

我们也可以使用 js 方法来实现跳转

1
2
3
4
5
6
7
8
9
10
11
12
13
14
15
16
17
18
19
20
21
22
23
24
25
  <template>
<div id="app">
<div>
<img src="./assets/logo.png">
</div>
<div>

<router-link to="/">主页</router-link>
<router-link to="/link/123">测试router-link</router-link>
<router-link to="/404">404</router-link>
+ <button @click="handleRouter">按钮点击跳转</button>
</div>
<router-view />
</div>
</template>
<script>
export default {
name: 'App',
+ methods: {
+ handleRouter() {
+ this.$router.push('/link/4567')
+ }
+ }
}
</script>

$router还有其他一些方法($router为 main.js 中声明的 router 变量)

  • replace 它不会向 history 添加新记录,而是替换掉当前的 history 记录。
  • go 类似于 window.history.go(),在 history 记录中向前或后退多少步

路由配置相关

配置默认页面,可以在路由列表的最后新加一项,当访问路径不存在时,重定向到首页。当所有路由都不满足时,就会直接加载最后一项。

1
2
3
4
5
6
7
8
9
10
11
12
13
14
15
16
17
18
19
  export default new Router({
routes: [
{
path: '/',
name: 'HelloWorld',
component: HelloWorld
},
{
path: '/link/:id',

name: 'link',
component: link
},
+ {
+ path: '*',
+ redirect: '/'
+ }
]
})

动态路由

路由列表的 path 也可以带参数,

1
2
3
4
{
path:'/link/:id',
component:link
}

当我们访问/link/1234时,我们可以通过this.$route.params.id的方式取出该参数值

1
2
3
4
5
6
7
8
9
10
11
12
13
14
15
16
17
18
19
20
  <template>
<div class="hello">
<h1>{{ msg }}</h1>
+ <h1>{{ $route.params.id}}</h1>
</div>
</template>

<script>
export default {
name: 'link',
data() {
return {
msg: '测试一下路由链接'
}
},
+ mounted() {
+ console.log(this.$route)
+ }
}
</script>

路由钩子

router 提供了导航钩子 beforeEach 和 afterEach,它们会在路由即将改变前和改变后触发。

钩子函数有三个参数

  • to 即将进入的目标的路由对象,在对应的目标页面我们可以用this.$route取出当前路由对象,也就是 to
  • from 当前导航即将离开的路由对象
  • next 调用该方法后,才能进入下一个钩子。next 中还可以设置参数,。设置为 false,可以取消导航,设置为具体的路径可以导航到指定的页面。典型的用法是校验客户是否登录。

例如我们将页面的 title 实时更改为组件的名称

src/main/js

1
2
3
4
5
6
7
8
9
10
11
12
13
14
15
16
17
18
  import Vue from 'vue'
import App from './App'
import router from './router'

Vue.config.productionTip = false

+ router.beforeEach((to, from, next) => {
+ console.log('to', to)
+ console.log('from', from)
+ window.document.title = to.name || "hello"
+ next()
+ })
new Vue({
el: '#app',
router,
components: { App },
template: '<App/>'
})

命名视图

<router-view>可指定 name,来使用指定 name 的组件,路由的路径,可以对应多个组件,默认使用的是 name 为 default 的组件

src/App.vue

1
2
3
4
5
6
7
8
9
10
11
12
13
<template>
<div id="app">
<router-view />
<router-view name="input1" />
<router-view name="input2" />
</div>
</template>

<script>
export default {
name: "App",
};
</script>

router/index.js

1
2
3
4
5
6
7
8
9
10
11
12
13
14
15
16
17
18
19
20
import Vue from "vue";
import Router from "vue-router";
import input1 from "@/components/input1";
import input2 from "@/components/input2";

Vue.use(Router);

export default new Router({
routes: [
{
path: "/",
name: "HelloWorld",
components: {
default: input1,
input1,
input2,
},
},
],
});

src/components/input1.vue 和 input2.vue,基本一致

1
2
3
4
5
6
7
8
9
10
11
12
13
14
15
16
17
<template>
<div class="hello">
input1
<input v-model="value" />
<h1>{{ value}}</h1>
</div>
</template>

<script>
export default {
data() {
return {
value: "",
};
},
};
</script>

当访问/时,三个router-view分别会被渲染为对应的组件。

二级路由

App.vue

1
2
3
4
5
6
7
<html>
<body>
<div id="app">
<router-view />
</div>
</body>
</html>

Home.vue

1
2
3
4
<div>
<router-link to="/child">
<router-view />
</div>

Child

1
<div>the child</div>
1
2
3
4
5
6
7
8
9
10
11
12
13
14
15
16
17
18
19
20
import Vue from "vue";
import Router from "vue-router";
import Home from "@/components/Home";
import Child from "@/components/Child";

export default new Router({
routes: [
{
path: "/",
name: "Home",
component: Home,
children: [
{
path: "child",
component: Child,
},
],
},
],
});

二级路由和命令视图结合

可参考这个demo

app.vue

1
2
3
4
5
6
7
8
9
10
11
12
13
14
15
<template>
<!-- 上下布局 -->
<div id="home">
<router-view class="view header" name="header"></router-view>
<!-- 左右布局 -->
<div class="flex_left_right">
<router-view class="view menu" name="menu"></router-view>
<router-view class="view content" name="content"></router-view>
</div>
</div>
</template>

<script>
export default {};
</script>

router/index.js,省略其他组件的代码

1
2
3
4
5
6
7
8
9
10
11
12
13
14
15
16
17
18
19
20
21
22
23
24
25
26
27
28
29
30
31
32
33
34
35
36
37
38
39
40
41
42
43
44
45
46
47
48
49
50
51
import Vue from "vue";
import Router from "vue-router";
import home from "@/pages/home";
import header from "@/components/header";
import menu from "@/components/menu";
import content from "@/components/content";
import list from "@/components/list";
import detail from "@/components/detail";

Vue.use(Router);

export default new Router({
routes: [
{
path: "/",
redirect: "/home/menu",
},
{
path: "/home",
name: "home",
component: home,
children: [
{
path: "menu",
components: {
header: header,
menu: menu,
content: content,
},
children: [
{
path: "list/:index",
name: "list",
component: list,
},
{
path: "list/:index/detail/:detailIndex",
name: "detail",
component: detail,
},
],
},
],
},
{
path: "/detailNoMenu",
name: "detailNoMenu",
component: detail,
},
],
});

其他

在 vue 代码中,我们可以使用

1
2
3
4
5
6
7
8
export default {
computed: {
func() {
console.log(this.$router); //在main.js注册进入Vue的router
console.log(this.$router.options); //在route/index.js中export的实例
},
},
};

使用router-link或使用$router.push时,可以传递 obj,指定跳转到命令的路由中

1
2
3
4
5
6
7
8
9
10
11
12
13
14
15
16
17
18
19
20
21
22
23
import Vue from "vue";
import Router from "vue-router";
import Home from "@/components/Home";
import Child from "@/components/Child";

export default new Router({
routes: [
{
path: "/",
name: "Home",
component: Home,
children: [
{
path: "child",
component: Child,
},
],
},
],
});

//App.vue params为路由url参数
this.#router.push({ name: "Home", params: { index: x } });

Vuex

1
npm install --save-dev vuex

新增文件src/store/index.js

1
2
3
4
5
6
7
8
9
10
11
12
13
14
15
16
17
18
19
20
21
import Vue from "vue";
import Vuex from "vuex";

Vue.use(Vuex);

export default new Vuex.Store({
//组件数据,只能读取,不能手动改变
state: {
count: 0,
},
//改变store中数据的唯一途径就是显式提交mutations,mutations可以接受两个参数,第二个参数可以是数字、字符串或对象等类型
mutations: {
increment(state, n = 1) {
state.count += n;
},
},
});

//调用mutations
this.$store.commit("increment");
this.$store.commit("increment", 100);

mutations 也可以接受一个包含 type 的对象

1
2
3
4
5
6
7
8
9
10
mutations: {
increment(state, params) {
state.count += params.count;
},
},
//调用mutations
this.$store.commit({
type:'increment',
count:10
})

vuex 还有三个选项可以使用:gettersactionsmodules

getters 一般用来对数据进行处理

1
2
3
4
5
6
7
8
9
10
11
12
13
14
15
16
17
18
19
20
21
22
23
24
25
26
27
28
29
30
31
32
33
34
35
export default new Vuex.Store({
state: {
list: [1, 5, 7, 10, 30],
},
//getters还可以把getters作为第二个参数
getters: {
filteredList: (state) => {
return state.list.filter((item) => item < 10);
},
listCount: (state, getters) => {
return getters.filteredList.length;
},
//getters可以定义函数式方法,外部调用可以传递参数
filteredListUnderMax(state) {
return function (max) {
return state.list.filter((item) => item < max);
};
},
},
});

//则我们在别的组件中就可以使用
export default {
computed: {
list() {
return this.$store.getters.filteredList;
},
listCount() {
return this.$store.getters.listCount;
},
filter() {
return this.$store.getters.filteredListUnderMax(10);
},
},
};

actions 类似 mutations,但是是异步执行的

modules,它用来将 store 分割到不同的模块中。

1
2
3
4
5
6
7
8
9
10
11
12
13
14
15
16
17
18
19
20
21
22
23
24
const moduleA = {
state: {},
mutations: {},
actions: {},
getters: {
//module 中的 mutaion 和 getter 还可以接受第三个参数,来访问根节点
sumCount(state,getters,rootState){
...
}
},
};
const moduleB = {
state: {},
mutations: {},
actions: {},
getters: {},
};

const store = new Vue.Store({
modules: {
a: moduleA,
b: moduleB,
},
});