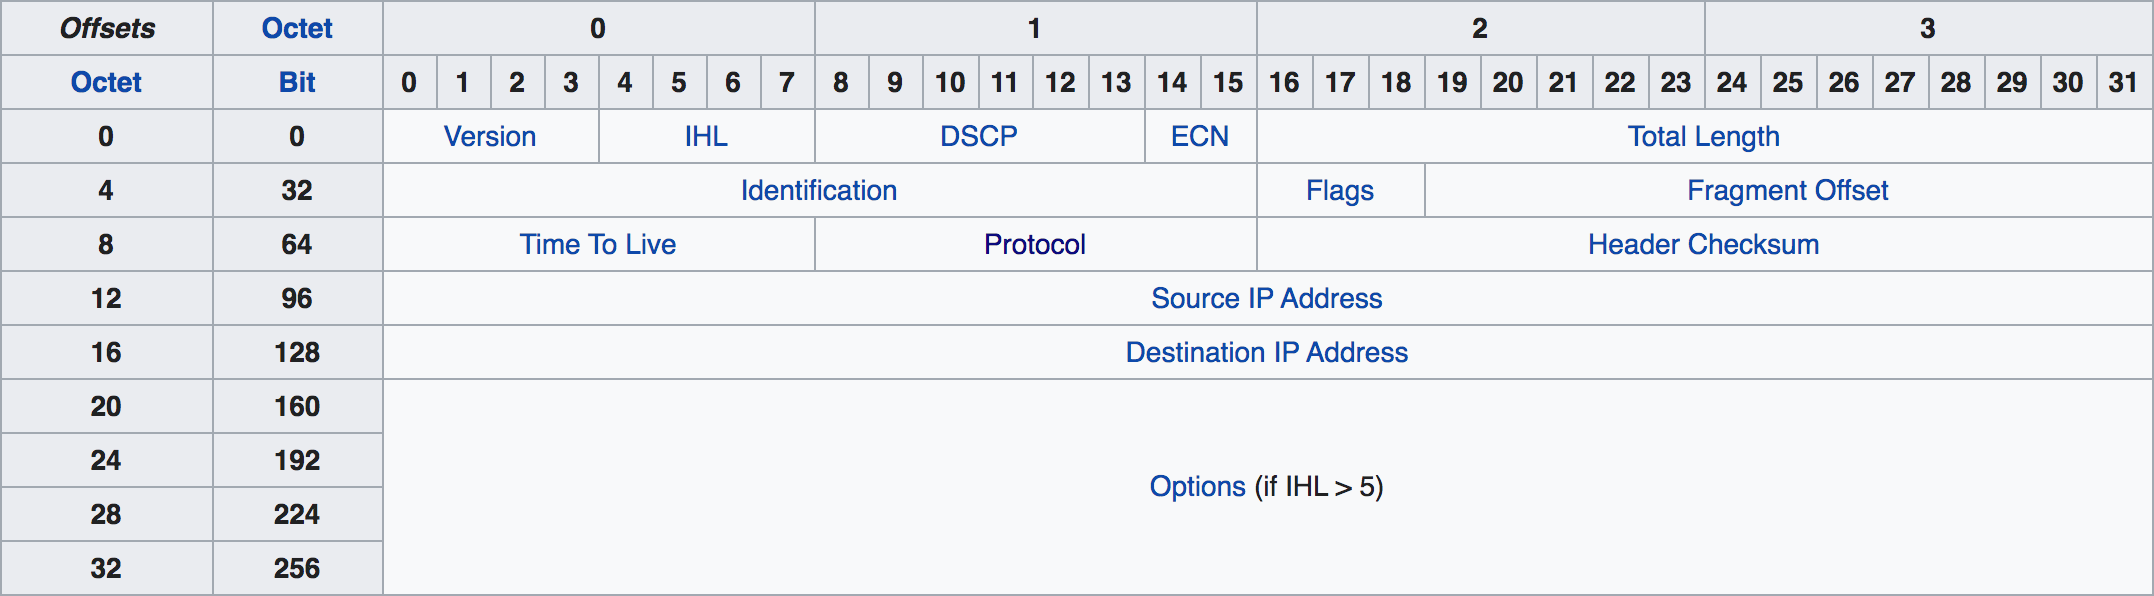
IP4 报文的报文头由 14 个属性构成,其中 13 个是必须的,第 14 个属性是可选的。
 我们抓取一段 ip 报文来分析上图
这里是使用tcpdump -i any 'ip[40:4] = 0x47455420' -A -nn -f抓取的一段报文
1 | 0x0000: 4500 0078 78c3 4000 4006 c9cb 0ad3 3706 E..xx.@.@.....7. |
我们根据 ip 报文头的格式截取整理一下,报文以 hex 显示,一位表示 4 个 byte
1 | 4500 0078 |
Version版本号4,表示 ip4 协议IHLip 报文头长度,计算规则为n * 32bits,最小为 5,当大于 5 时,说明报文头有扩展字段,此处为5,表明没有扩展字段DSCP差分服务代码点,用以路由器进行转发时来区分优先级ECN拥赛指示标记,用以通知报文传输速度的调整Total Length报文总长度,包括报文头和报文体,最小为 20 字节,即报文头的最小长度78表明长度为 120 个字节Identification用于确认是否归属同一组报文的标记78c3Flags分组标记,占据 3 个 bits,每个 bits 的含义为:- bit 0: 备用位
- bit 1: 不要分组 Don't Fragment (DF)
- bit 2: More Fragments (MF)
4000 转换为二进制为 0
100000000000000,第二个 bits 为 1,表示不需要分组Fragement Offset指定分组的报文体相对于总报文的偏移字节量,占据 13 个 bits,最大可以表示(213 – 1) × 8 = 65,528 bytes。4000 转换为二进制为 0100000000000000,后 13 个 bits 表示的便宜量为 0Time To Live (TTL)报文的最大保存时间,现在一般用来表示转发次数,即访问路由器的次数,每次访问一次路由器就减 1,变 0 后路由器便丢弃该报文,并发送 ICMP Time Exceeded 给发送方。40表示最多转发 64 次Protocol报文体的协议类型,详细见rfc790,此处06表示Header Checksum报文校验值,通过算法计算报文得出一个值,路由器通过比对校验值,确定报文完整性Source address源地址,ip4 的地址一般采用点十表示法,例如127.0.0.1在 ip 报文传输过程中,每段 ip 地址使用 8bits 表示,所以 ip 地址每段的取值范围为0~255。0ad3 3706每两位转换为十进制则是10.211.55.6。转换过程大致如下所示
Destination address目标地址Options扩展字段
 不要使用
不要使用
 eclipse 中工具区示例
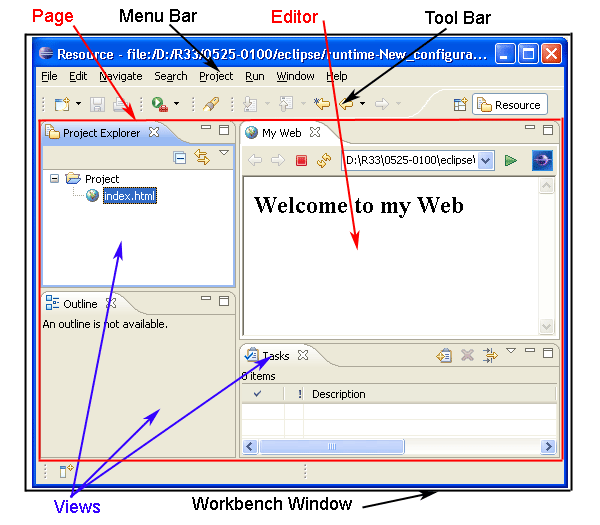
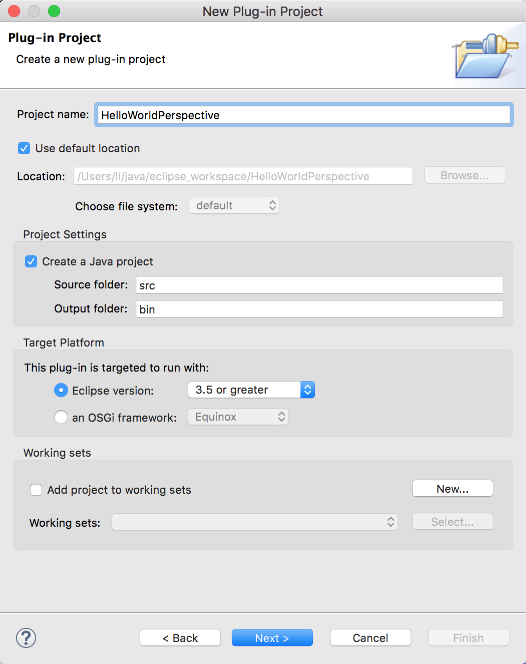
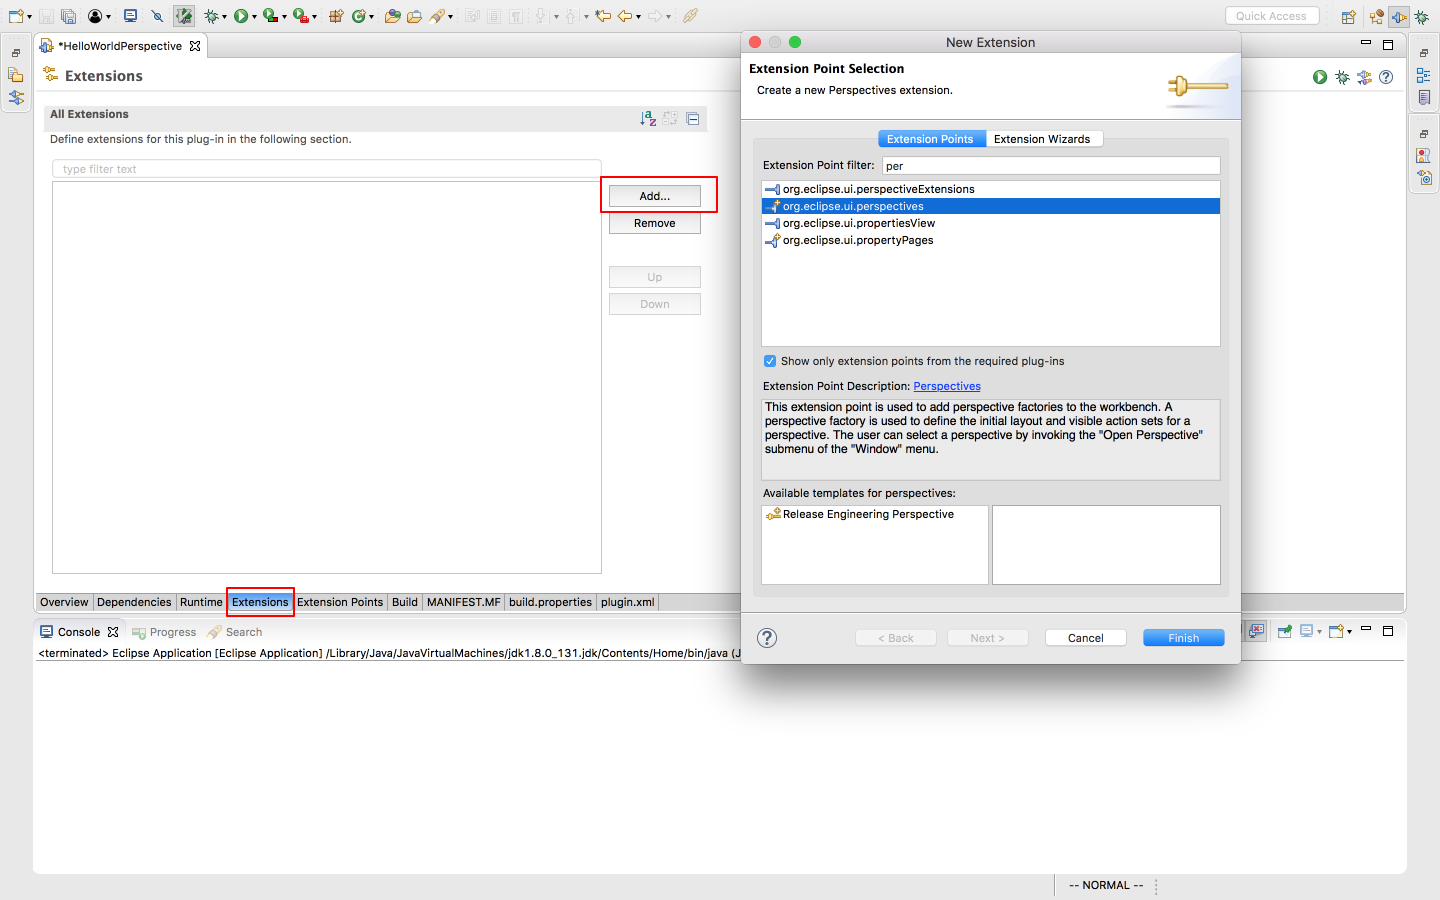
 使用一个唯一 ID
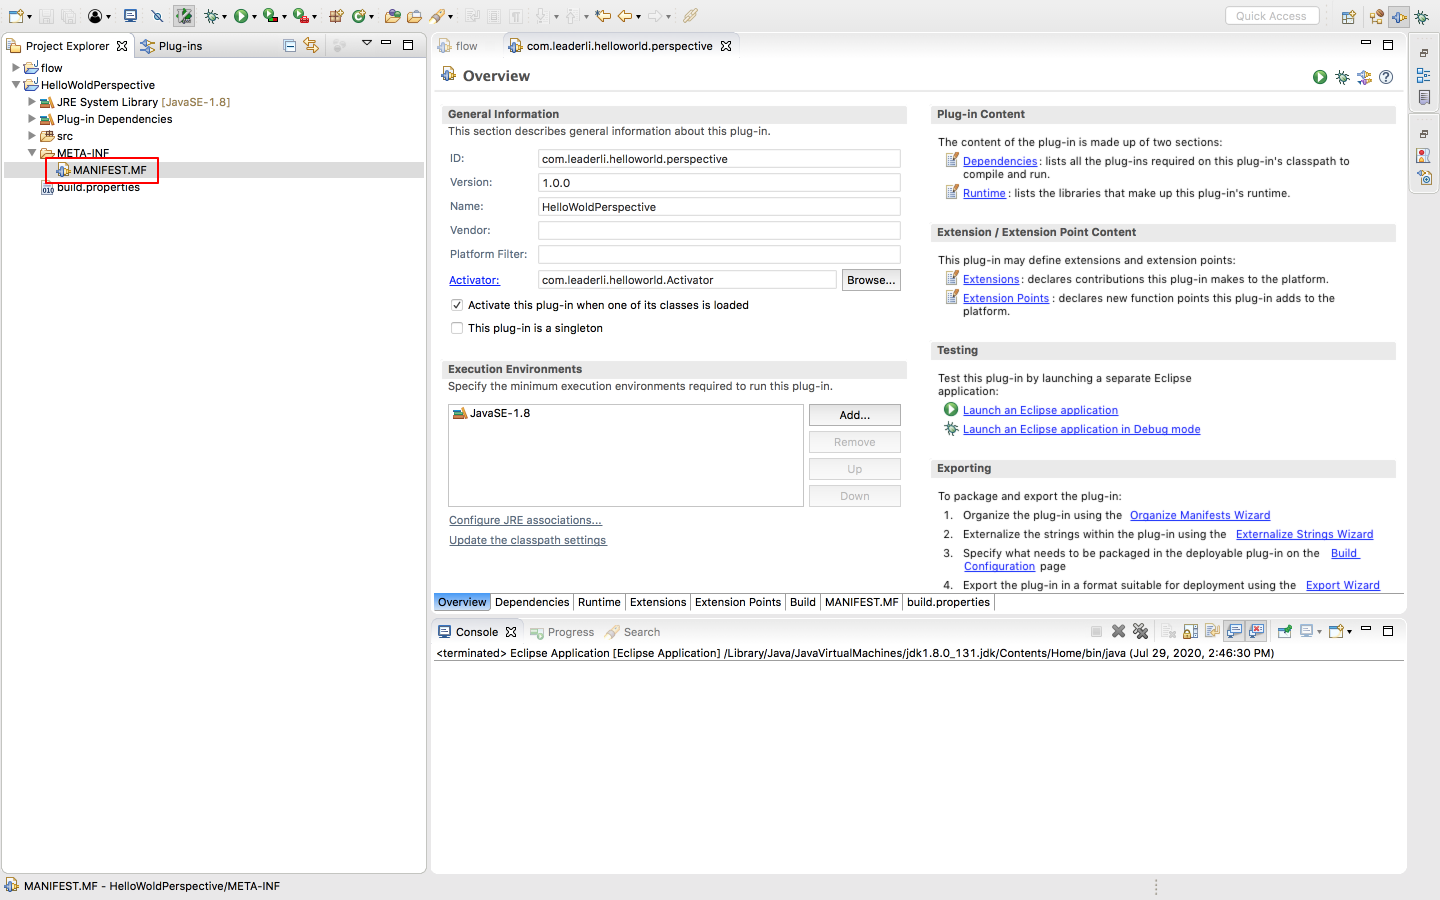
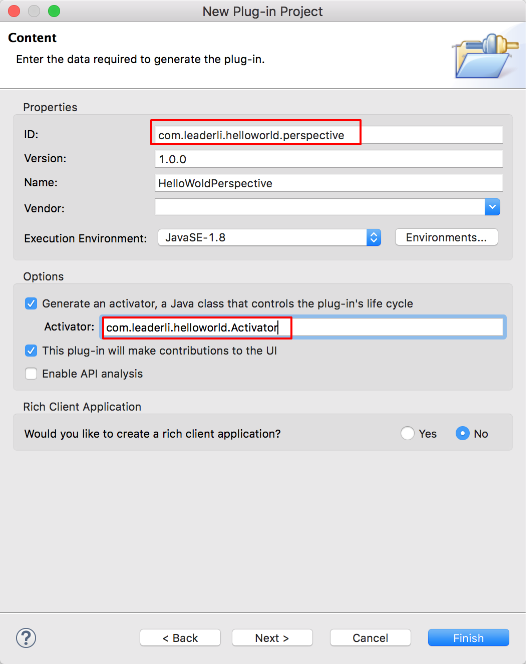
 保存后会生成
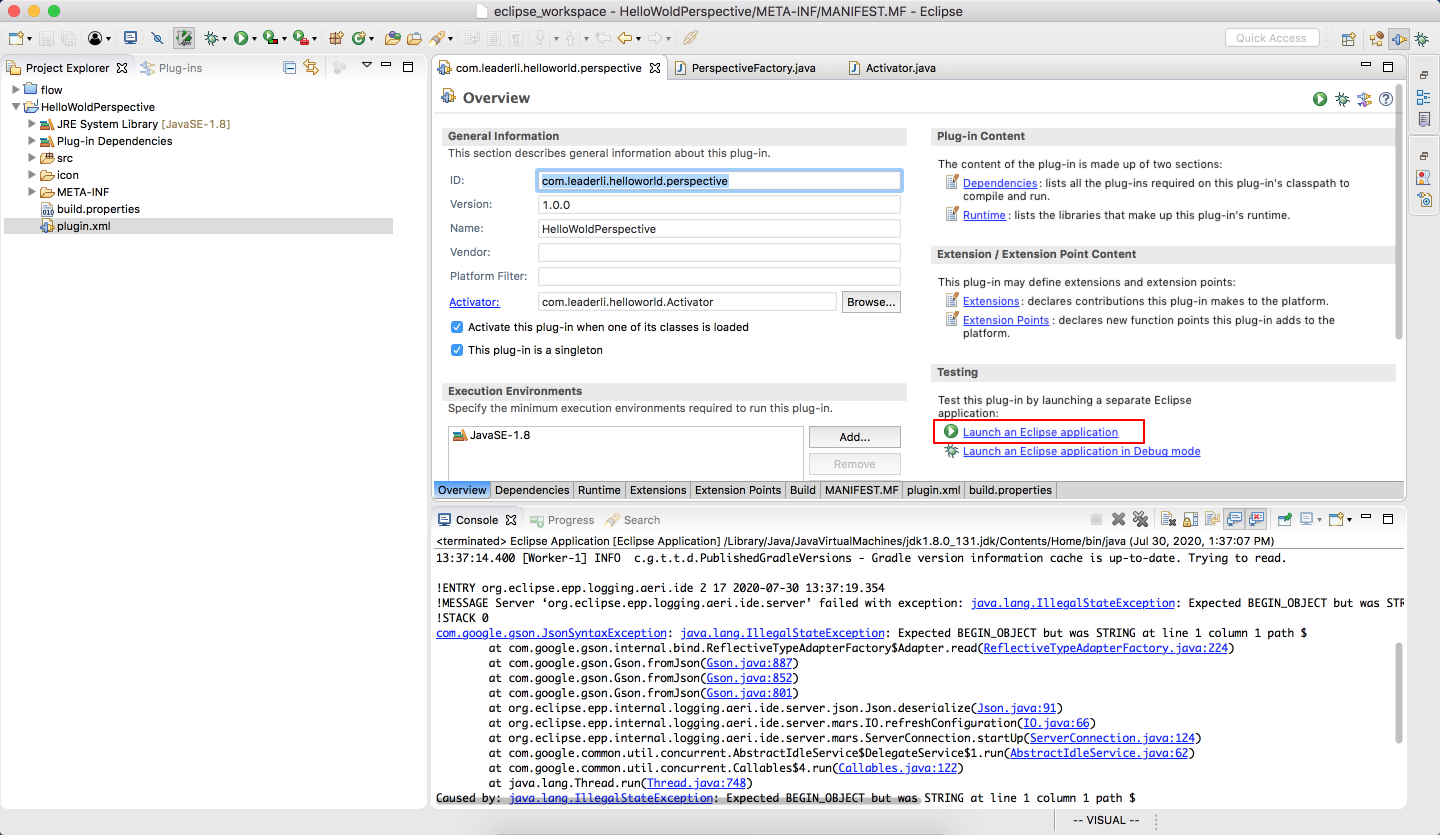
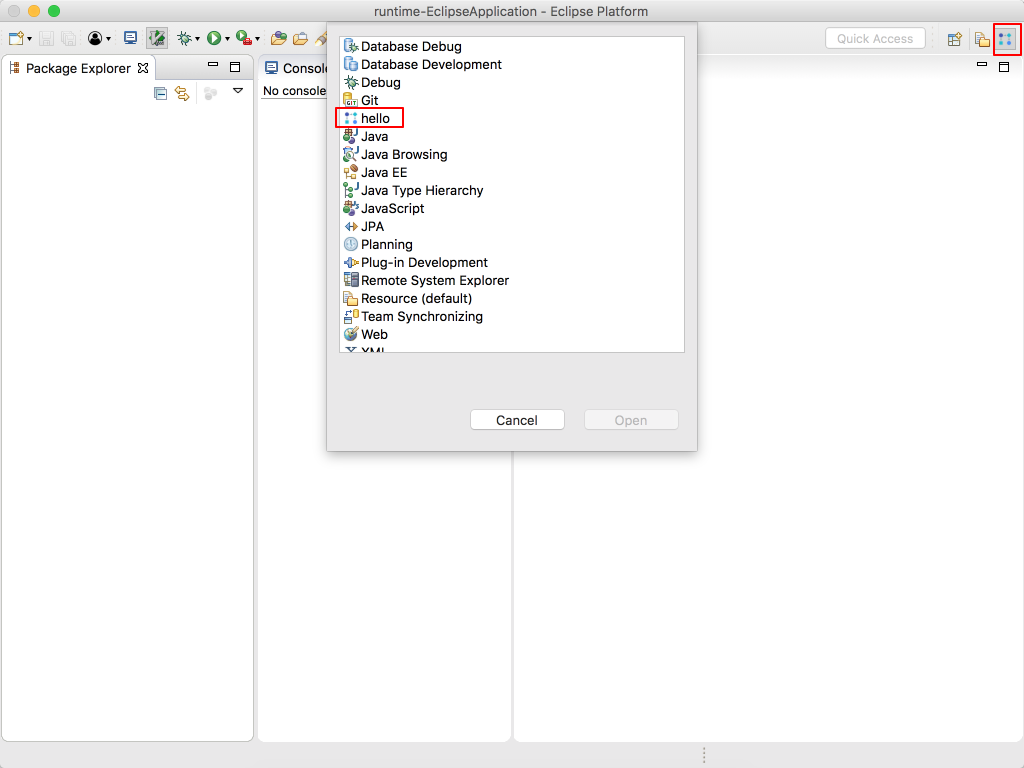 我们可以看到生成了 hello 透视图,且透视图下有 console 窗口和资源窗口