实现
springboot提供了注解@PropertySource来实现加载配置文件。 一个普通的注解配置,也可注解在其他@Configuration类上
1 |
|
PropertySource和PropertySourceFactory的源码
1 |
|
PropertySource的factory来表示使用何种PropertySourceFactory来实现加载过程,value指向的文件会被spring加载为EncodedResource实例以供PropertySourceFactory使用
value的值需要为有效资源,若我们需要加载绝对路径的资源文件,我们无视value的资源,仅加载自己所需要加载的配置文件。 首先我们了解下如何加载yaml配置
custom.yml配置文件,路径为/Users/li/java/workspace/branches/src/main/resources/custom.yml
1 | foo: 1 |
我们可以使用FileSystemResource加载文件资源
1 | package com.leaderli.branches.utils; |
测试程序
1 | package com.leaderli.branches.config; |
接下来只需要实现PropertySourceFactory接口即可
1 | package com.leaderli.branches.config; |


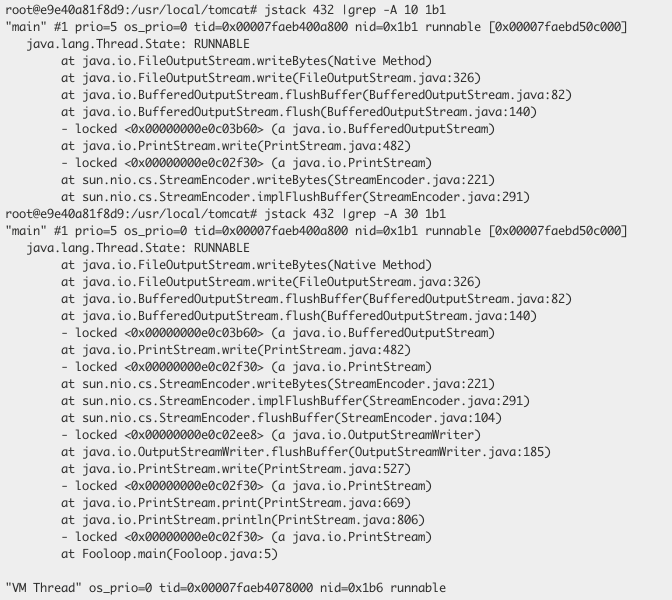 通过日志,可以看出问题出在


 当
当


 当一个
当一个